
Team members
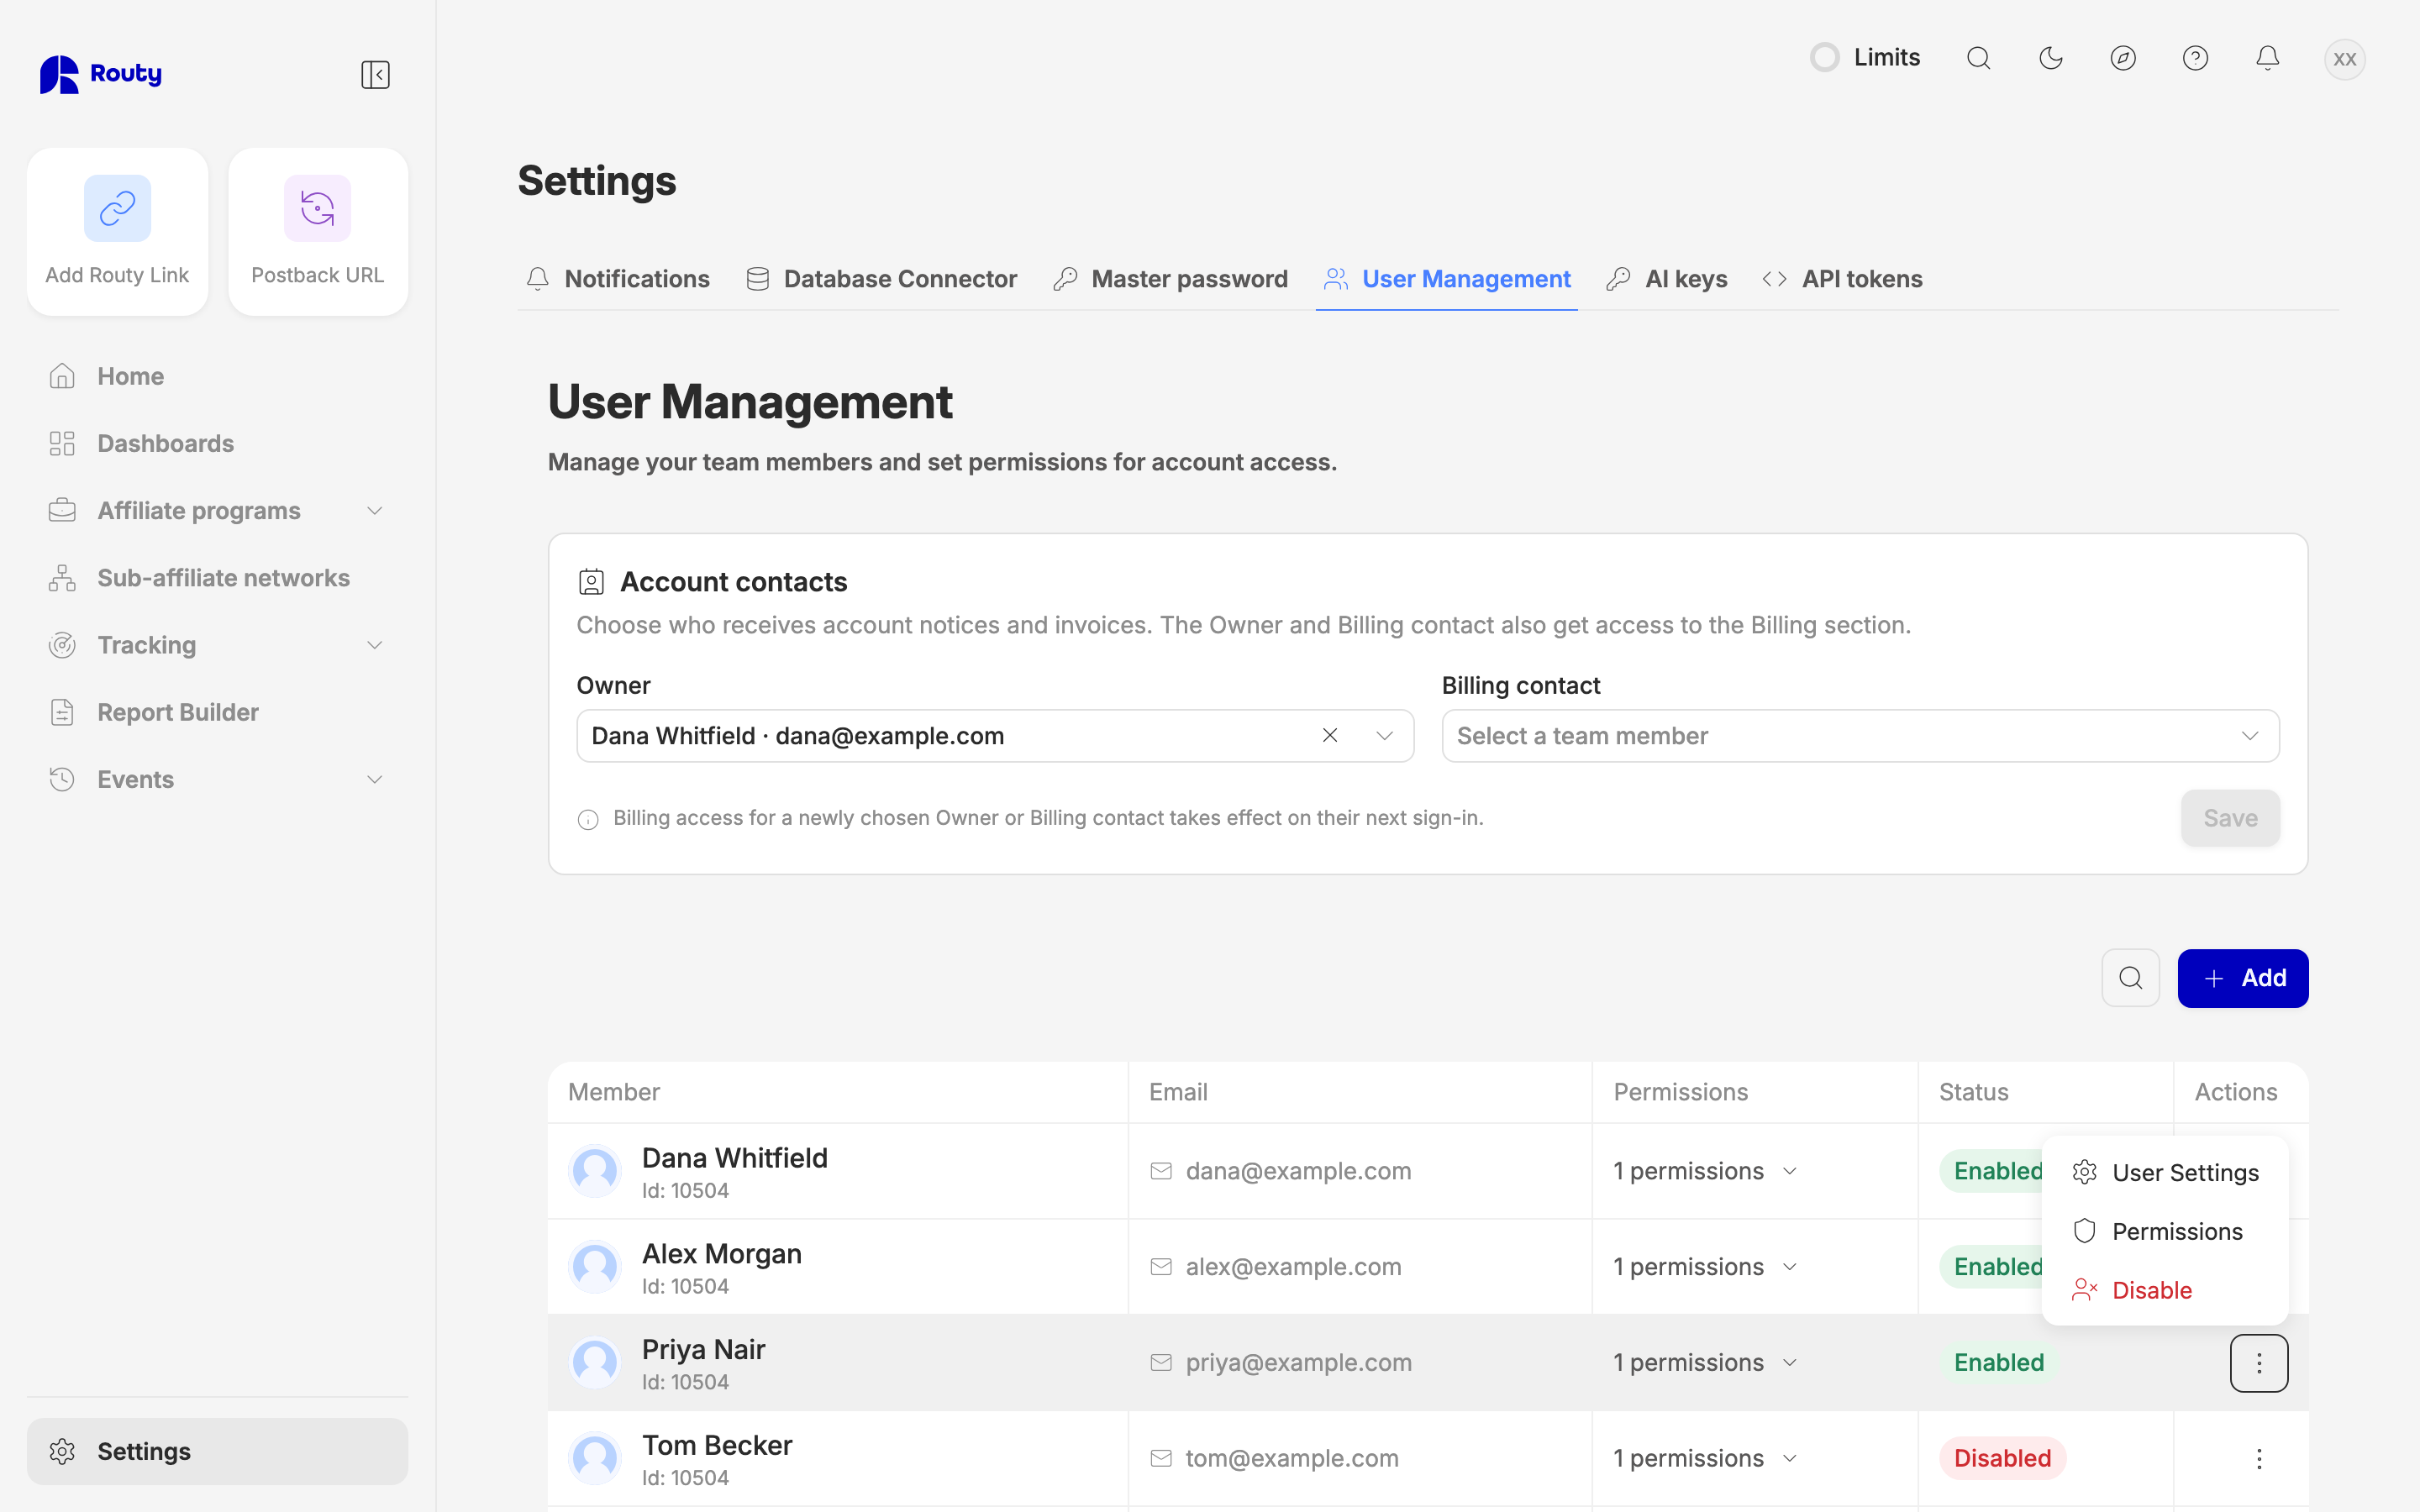
Settings → User Management lists everyone on your account. From a teammate's menu (⋮) you can edit their details and permissions, and disable or re-enable them.
Disable a teammate
Disable someone when they leave or shouldn't have access for now. Nothing they created is removed.
- Open the menu (⋮) on their row and choose Disable.
- Confirm.
Within about 2 minutes they're signed out and can't sign back in, with a password or with single sign-on. Their seat is freed. The seat count on your plan can take a little longer to catch up.
If your company uses single sign-on, removing someone in Microsoft Entra doesn't end the session they already have, so disable them here as well.
Enable a teammate
Open the menu (⋮) on their row and choose Enable. They can sign in again, and they take up a seat again.
If every seat is in use, they stay disabled and the page tells you so. Disable someone else to free a seat, or upgrade your plan. If you can't manage billing, the page tells you who to ask.

Who can disable or enable
Only account owners and admins see these options, and only for teammates homed on their own account. They don't appear for:
- yourself
- the account owner
- anyone whose Status isn't Enabled or Disabled, such as Awaiting or Suspended
To disable the owner, first move ownership to someone else in the Account contacts card at the top of the page.
Collaborators who've selected another account can't manage that account's team.
Status
Troubleshooting
"You can't change this teammate's status." They may be the new owner, or a Routy staff member. Refresh the page, and contact support if they should be manageable.
They can still use Routy just after being disabled. It can take up to about 2 minutes.
When to contact support
Contact support to lift a suspension, or if a seat count still looks wrong a day after you disabled someone.